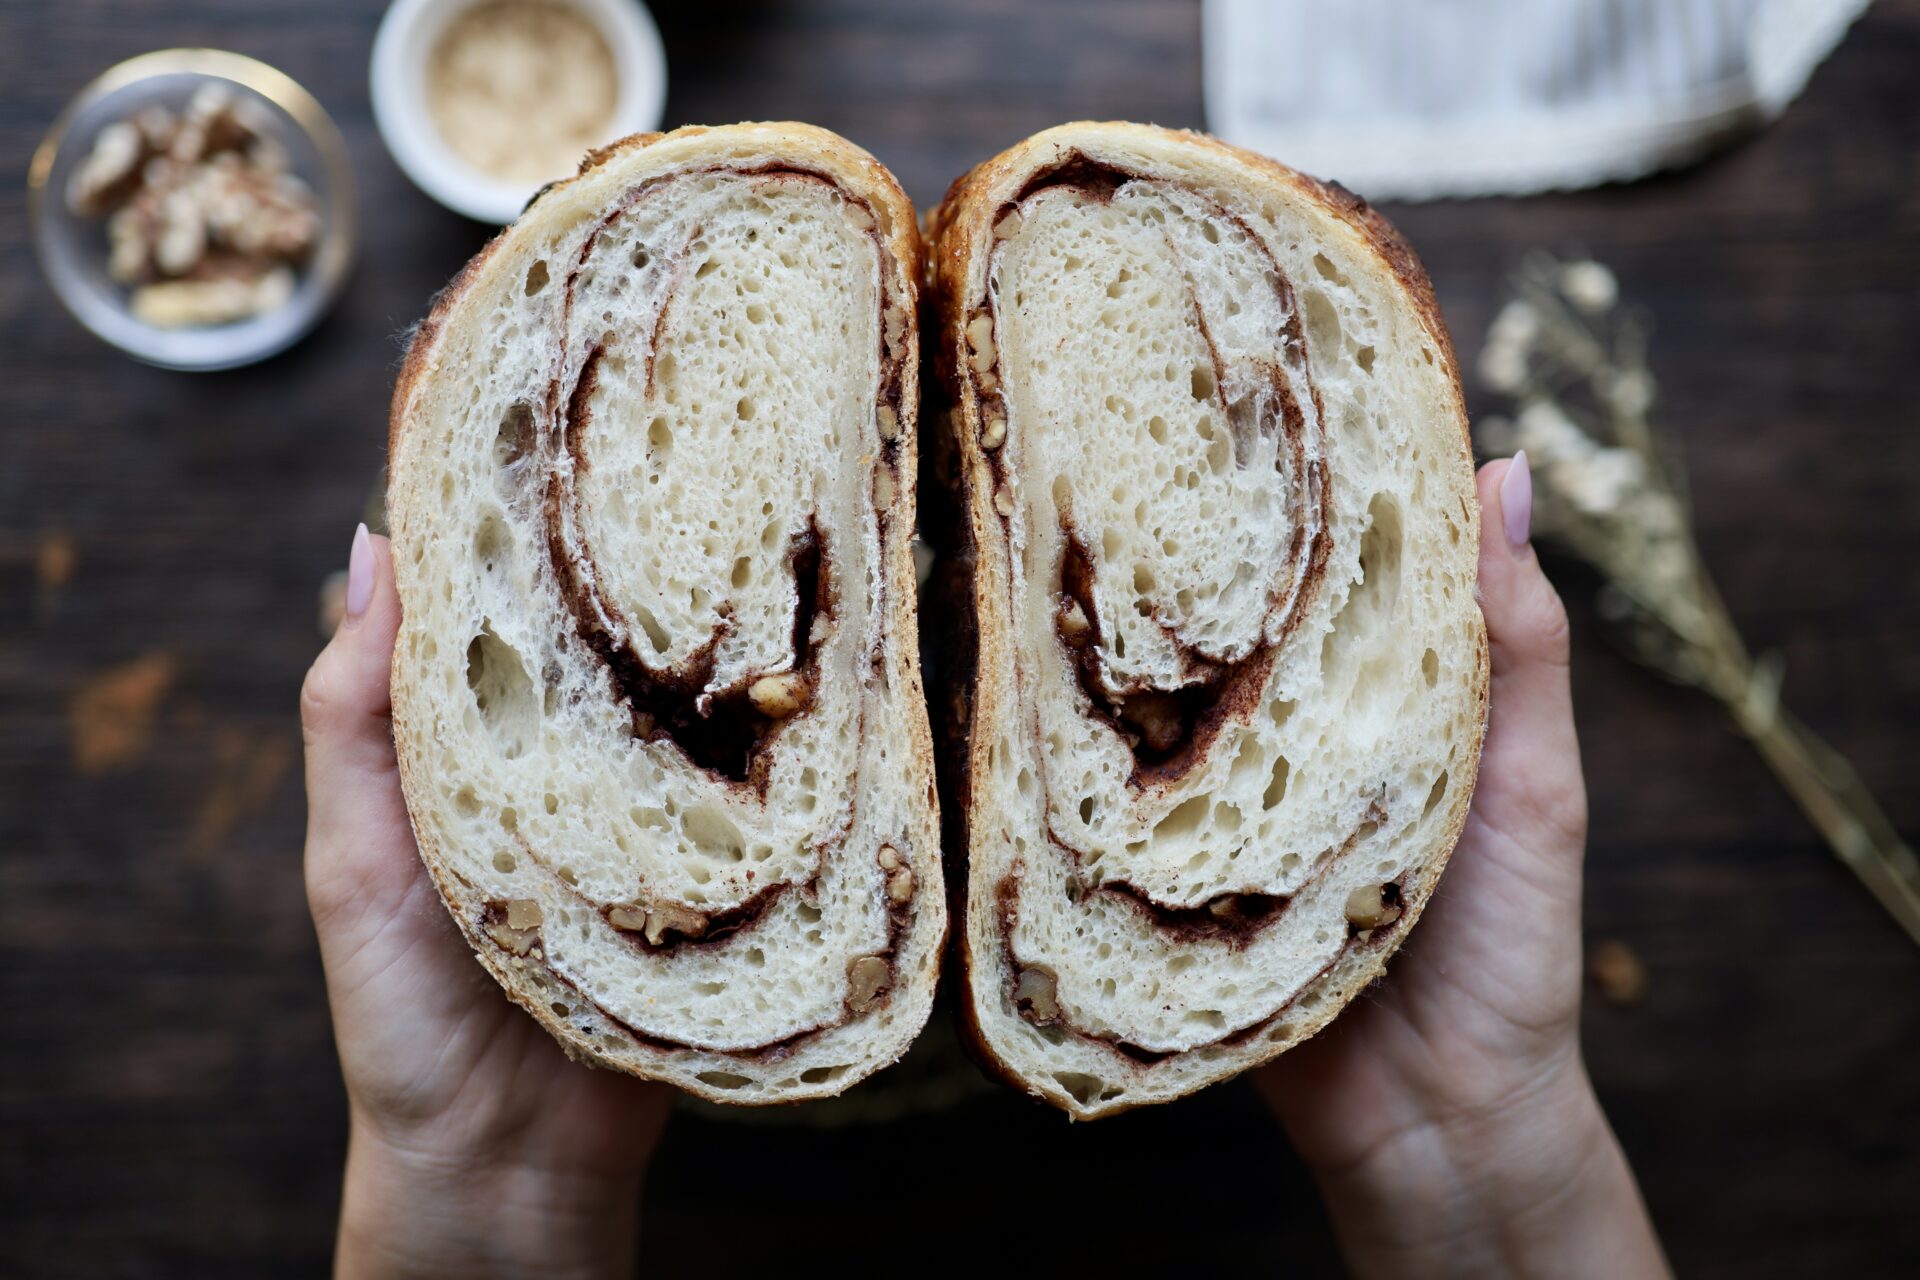
Think sourdough meets cinnamon bun. If you’ve ever dreamed of that combination, then this recipe will become your new favorite. It’s the classic sourdough recipe but with swirls of brown sugar, cinnamon, and walnuts. This Sourdough with Brown Sugar, Cinnamon, and Walnuts is absolutely perfect.
Jump to Recipe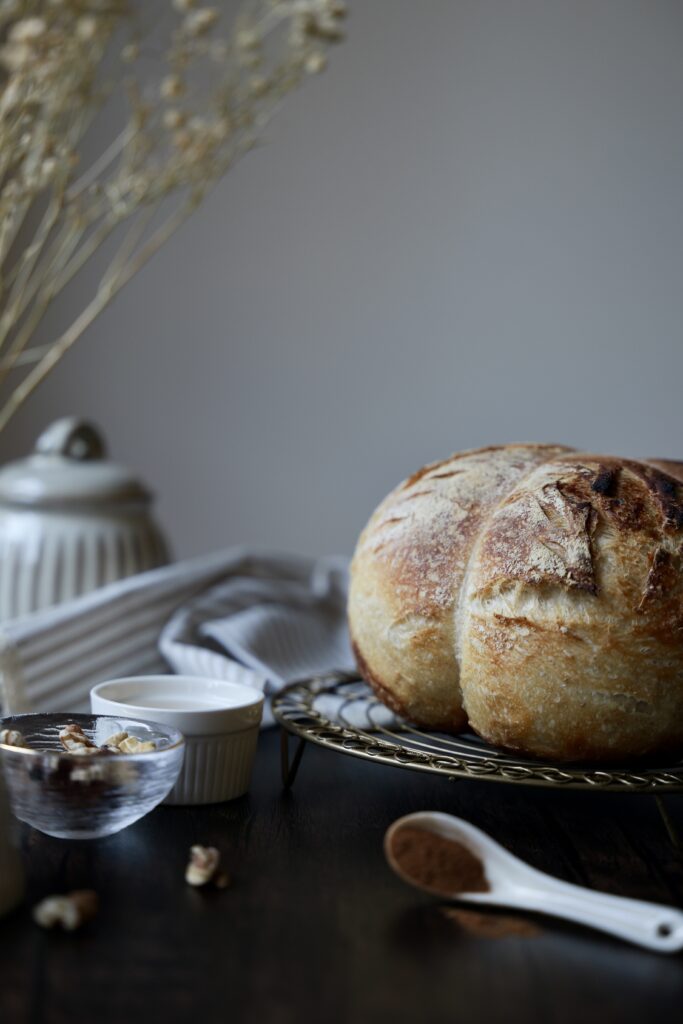
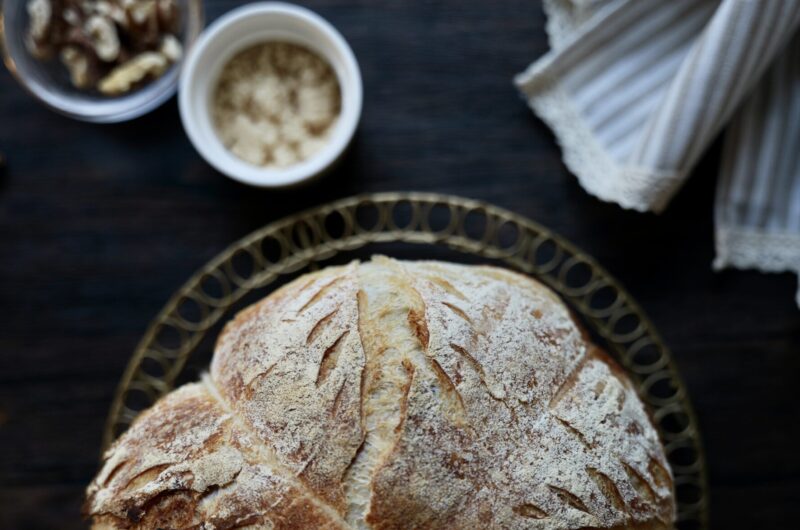
Here’s What You’ll Need for this Recipe:
Ingredients:
- 400 grams white flour
- 280 grams filtered room-temp water
- 8 grams salt
- 80 grams sourdough starter
For the Filling:
- 1/4 cup brown sugar
- 1 tablespoon cinnamon
- 2 tablespoons chopped walnuts
Mixing the Dough
- In a large mixing bowl, combine the white flour, filtered room-temp water, salt, and sourdough starter.
- Mix the ingredients with your hands or a dough whisk until it forms a shaggy dough. This process should take about one minute.
- Once combined, cover the bowl with a cloth and let it rest for about one hour.
- After one hour, perform a series of stretches and folds on the dough. To do this, wet your hand to prevent sticking, then grab one side of the dough, stretch it upwards, and fold it over to the opposite side. Rotate the bowl by 90 degrees and repeat the process until you’ve come full circle.
- Cover the dough again and let it rest for one hour.
- Repeat the series of stretches and folds every hour, a total of 3 cycles.
- Once the stretch and fold process is complete, let the dough rest in the bowl, covered with a cloth or dish towel, for bulk fermentation. This can vary in time depending on the temperature of your kitchen, but generally, it lasts 3-5 hours. The dough should rise significantly, and you might notice some bubbles appear on it.
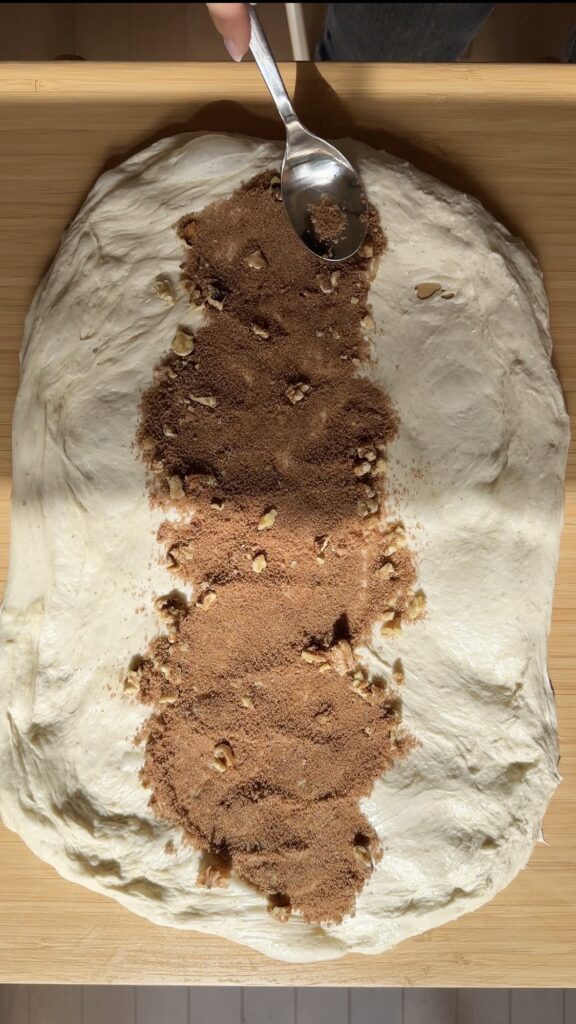
- After the bulk fermentation, your dough is ready to be shaped and filled with the brown sugar, cinnamon, and walnut mixture as per the following steps in your original recipe. Look at the pictures below to help guide you.
Note: The temperature of your environment plays a crucial role in sourdough fermentation. If it’s cooler, the fermentation might take longer; if it’s in warmer environments, it could be quicker. Keep an eye on your dough and use its appearance and behavior as your guide rather than strictly sticking to time. This might be hard at first, so if it’s your first time making a sourdough and you feel unsure, then follow the schedule. In summer months, or if your kitchen is warm (above 75 F), allow the dough to ferment for 3 hours after the last stretch and fold. In winter months, or if your kitchen is cold (if you are wearing socks and a sweater in the house), then allow it to ferment for 5 hours.
Shaping and Filling the Sourdough with Brown Sugar
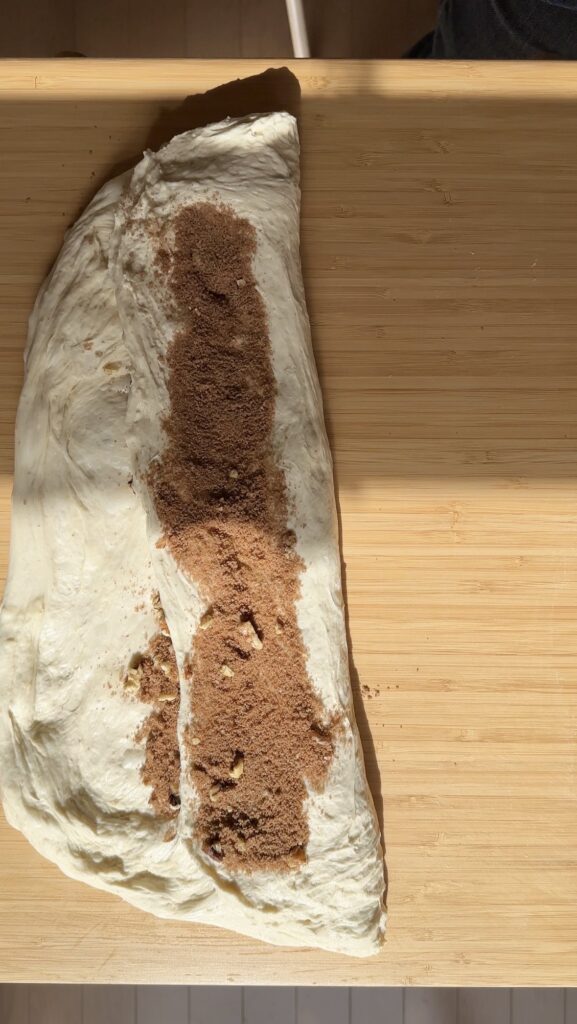
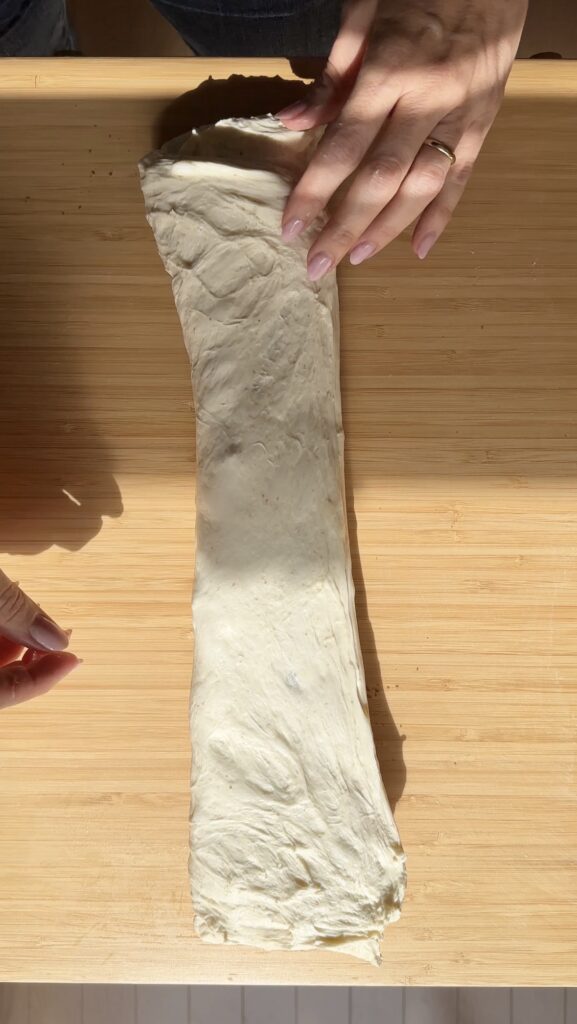
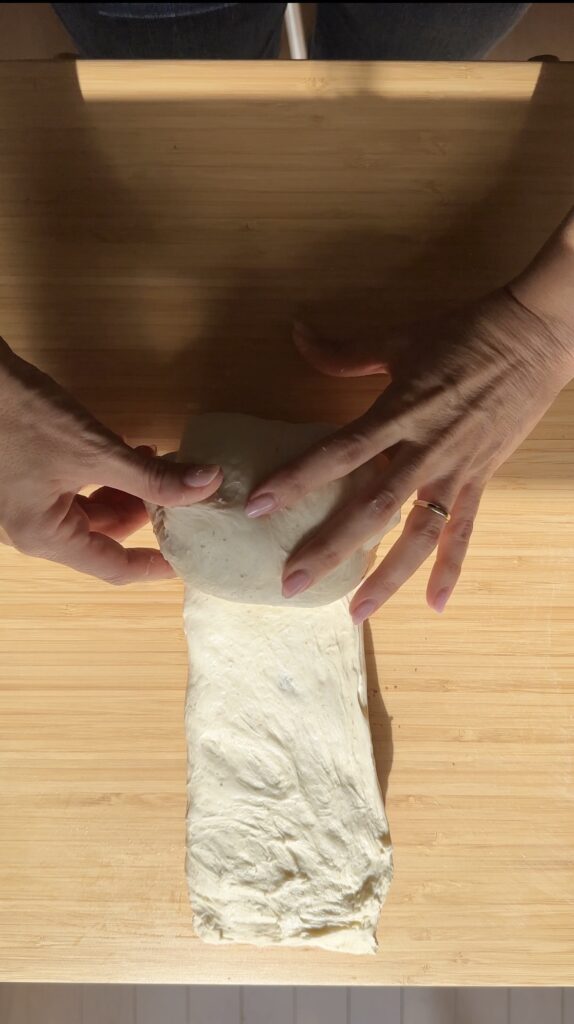
- After bulk fermentation, gently lay out the dough on a lightly floured countertop or use my new method – dampening the countertop with water. It’s fantastic! Wet your fingertips too; gently stretch the dough into a rectangular shape. Sprinkle 3/4 of the brown sugar, cinnamon, and walnut mixture down the dough’s center. Fold the dough lengthwise by one third, then sprinkle the remaining filling. Fold the other third of the dough over. Gently roll the dough so it forms a ball.
Second Fermentation
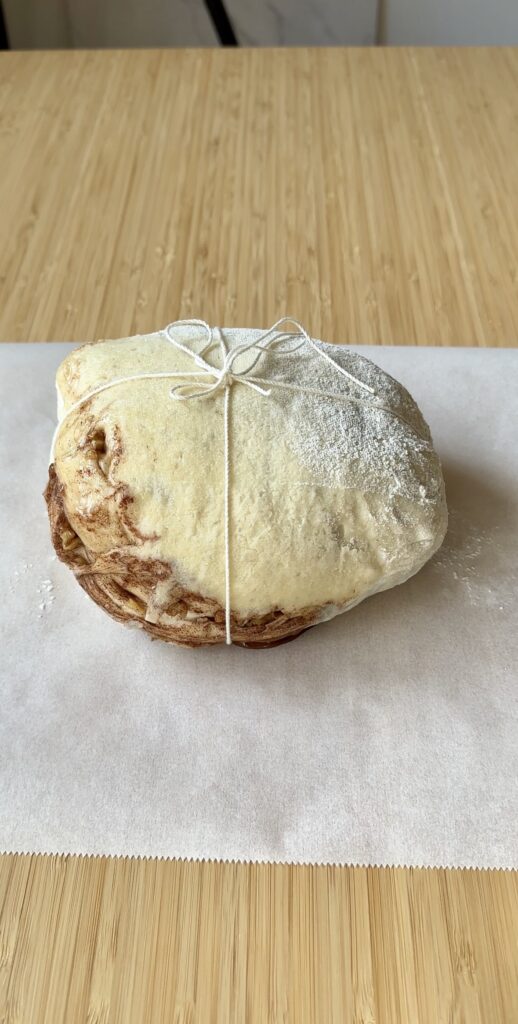
- Using your hands, push the dough ball, and when pulling it back, this will build some tension, making the dough “tighter.” Set this dough in a floured banneton. Cover it with a dishcloth and let it sit for an hour, allowing it to ferment once more. After this, you can bake immediately or cover it with plastic and refrigerate for up to 24 hours, baking when ready.
Baking
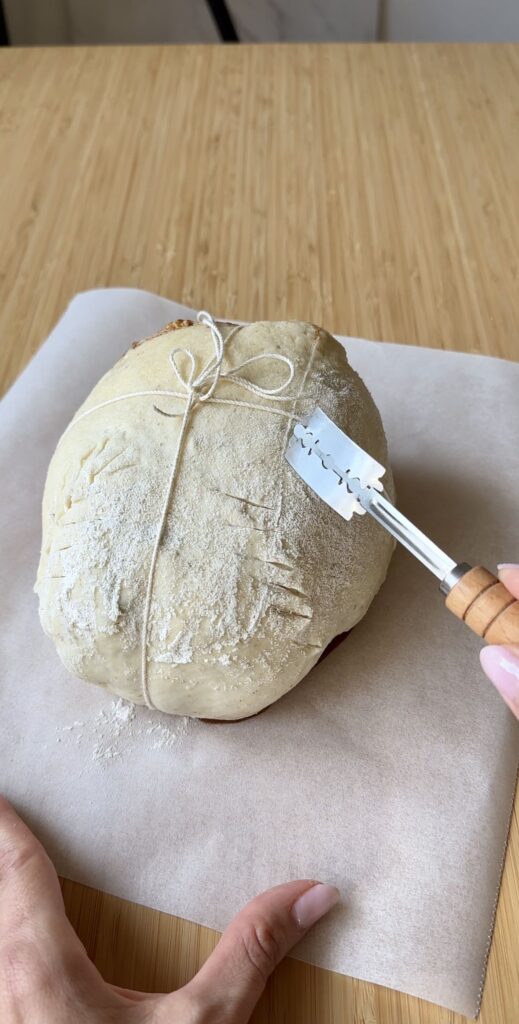
- Preheat your oven to 450 F and place a Dutch oven inside. Once heated, remove the Dutch oven and lay the dough on parchment paper. Make a split down its center using a kitchen razor or craft a design of your liking. Lift the dough using the parchment paper and place it inside the Dutch oven. Cover it with the lid and bake for 24 minutes. After this, remove the lid and bake for an additional 23 minutes.
- Once baked, take the bread out of the Dutch oven and allow it to cool on a baking rack. I recommend waiting between 4-6 hours before you treat yourself to the first slice.
Sourdough with Brown Sugar, Cinnamon and Walnuts
Course: SidesCuisine: AmericanDifficulty: Medium12
servings30
minutes47
minutes159
kcalIngredients
400 grams white flour
280 grams filtered room-temp water
8 grams salt
80 grams sourdough starter
- For the Filling:
1/4 cup brown sugar
1 tablespoon cinnamon
2 tablespoons chopped walnuts
Directions
- Combine the white flour, filtered room-temperature water, salt, and sourdough starter in a large mixing bowl.
- Mix the ingredients with your hands or a dough whisk until it forms a shaggy dough. This process should take about one minute.
- Once combined, cover the bowl with a cloth and let it rest for about one hour.
- After one hour, perform a series of stretches and folds on the dough. To do this, wet your hand to prevent sticking, then grab one side of the dough, stretch it upwards, and fold it over to the opposite side. Rotate the bowl by 90 degrees and repeat the process until you’ve come full circle.
- Cover the dough again and let it rest for one hour.
- Repeat the series of stretches and folds every hour, a total of 3 cycles.
- Once the stretch and fold process is complete, let the dough rest in the bowl, covered with a cloth or dish towel, for bulk fermentation. This can vary in time depending on the temperature of your kitchen, but generally, it lasts 3-5 hours. The dough should rise significantly, and you might notice some bubbles appear on it.
- After the bulk fermentation, your dough is ready to be shaped and filled with the brown sugar, cinnamon, and walnut mixture as per the following steps in your original recipe. Look at the pictures below to help guide you.
- Shaping and Filling
- After bulk fermentation, gently lay out the dough on a lightly floured countertop or use my new method – dampening the countertop with water. Wet your fingertips too; it helps in gently stretching the dough into a rectangular shape. Sprinkle 3/4 of the brown sugar, cinnamon, and walnut mixture down the dough’s center. Fold the dough lengthwise by one third, then sprinkle the remaining filling. Fold the other third of the dough over. Gently roll the dough so it forms a ball.
- Using your hands, push the dough ball, and when pulling it back, ensure it builds some tension, making the dough “tighter”. Set this dough in a floured banneton. Cover it with a dish cloth and let it sit for an hour, allowing it to ferment once more. After this, you can choose to bake immediately or cover it with plastic and refrigerate for up to 24 hours, baking when you’re ready.
- Baking
- Place your Dutch oven inside the oven and preheat your oven to 450 F. Once heated, remove the Dutch oven and lay the dough on parchment paper. Fashion a split down its center using a kitchen razor or craft a design of your liking. Lift the dough using the parchment paper and place it inside the Dutch oven. Cover it with the lid and bake for 24 minutes. After this, remove the lid and bake for an additional 23 minutes.
- Once baked, take the bread out of the Dutch oven and cool on a baking rack. I recommend waiting between 4-6 hours before slicing the bread.
Please be aware that the information provided with this recipe is intended solely for general informational purposes. While we have tried to accurately test this recipe and present precise measurements and instructions, individual results may vary due to differences in ingredient types, cooking equipment, or preparation techniques.The nutritional information accompanying this recipe is not intended as dietary or medical advice. For any specific health or nutritional inquiries, please consult a registered dietitian or healthcare professional. We disclaim any liability for inaccuracies or misrepresentation of the provided information. We encourage users to approach this recipe with a mindful understanding that cooking is both an art and a science, and to use their best judgment in the kitchen.