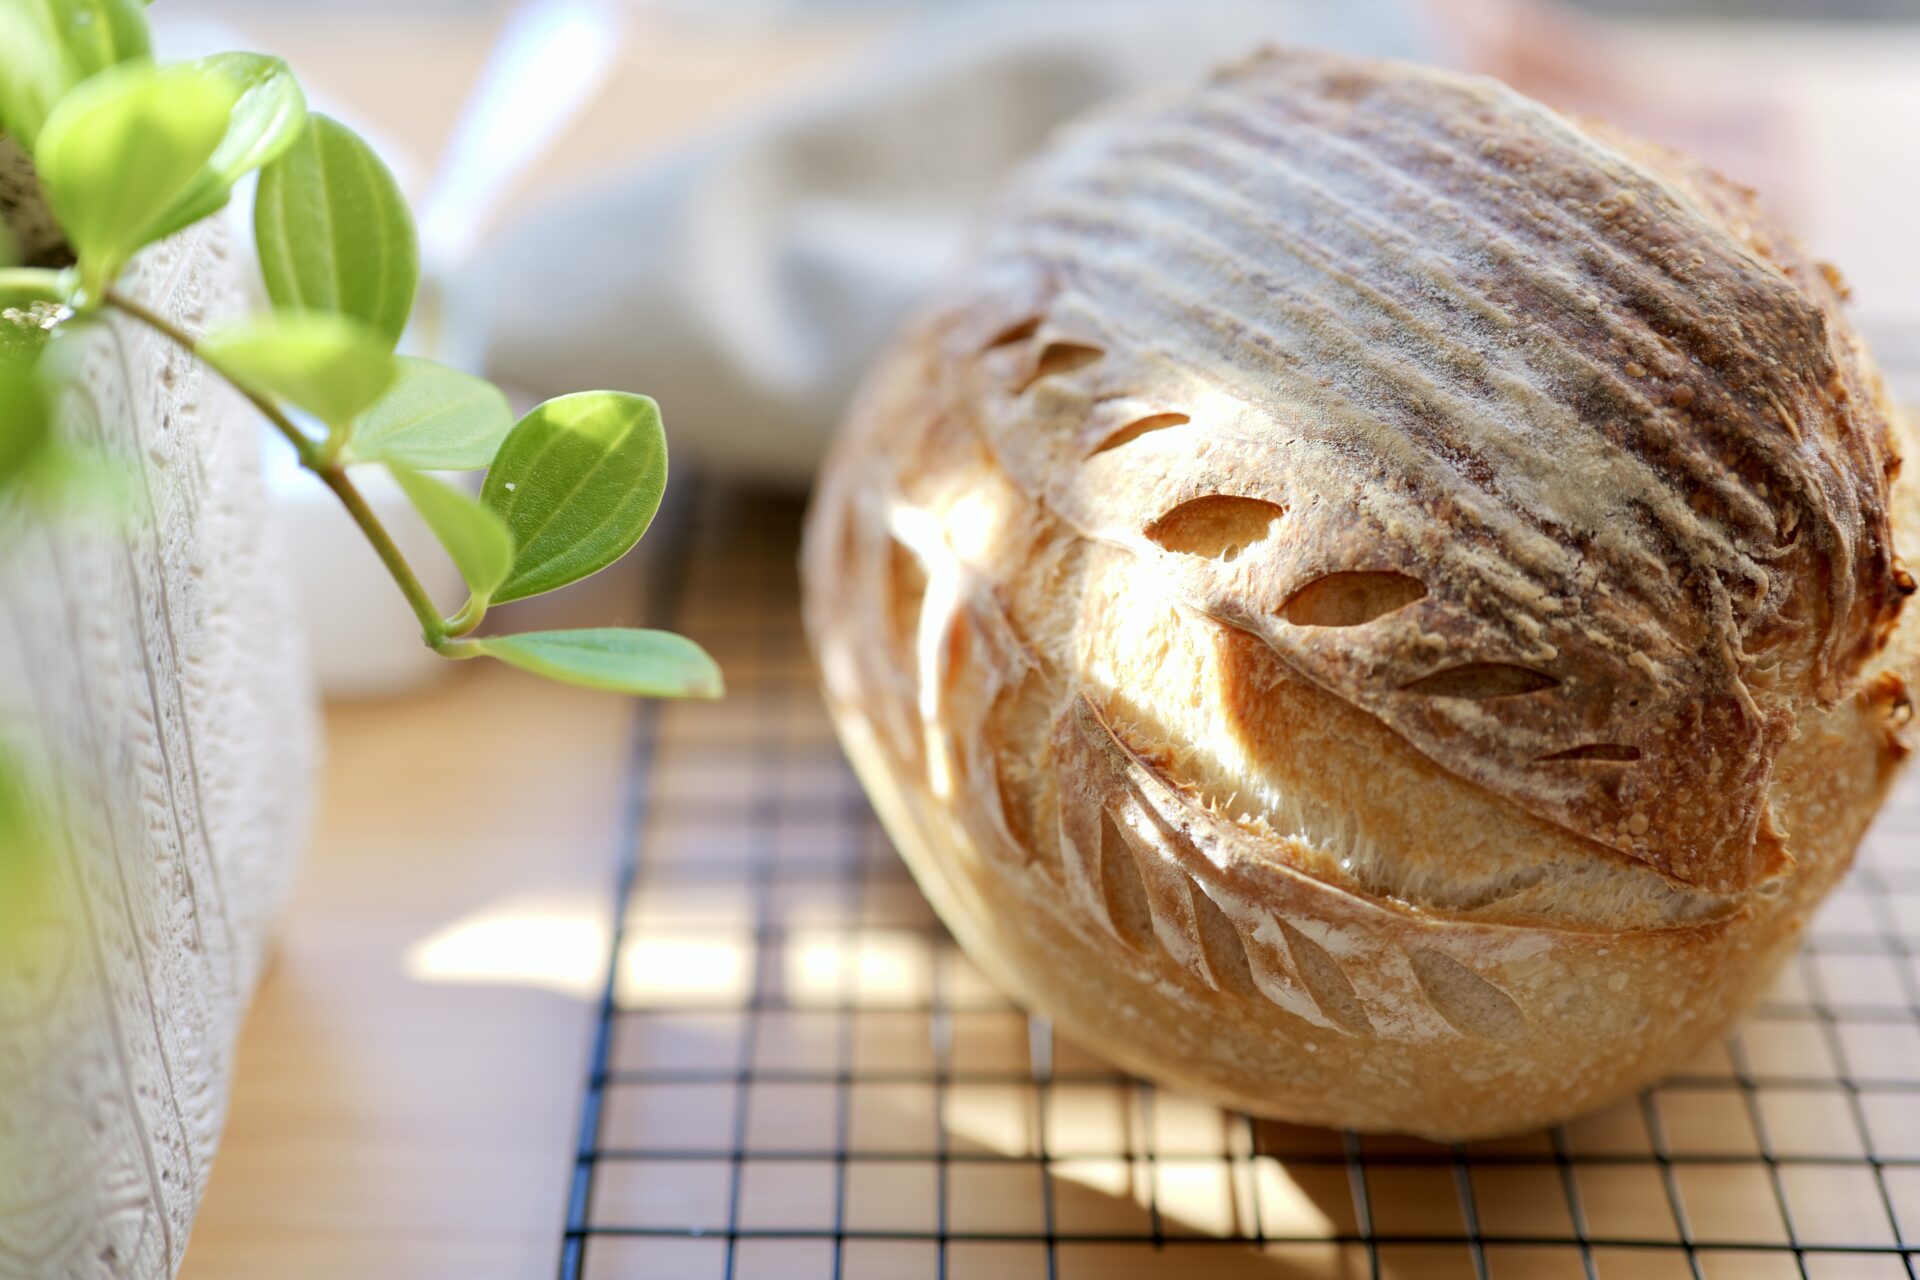
To me, Sourdough Bread is an art form. Its chewy center wrapped in a crispy crust is absolute heaven. Give me a slice, toasted and buttered, and I’m in paradise. I could have it for breakfast, lunch, and dinner without a second thought. But, believe it or not, baking sourdough wasn’t a family tradition growing up.
Jump to Recipe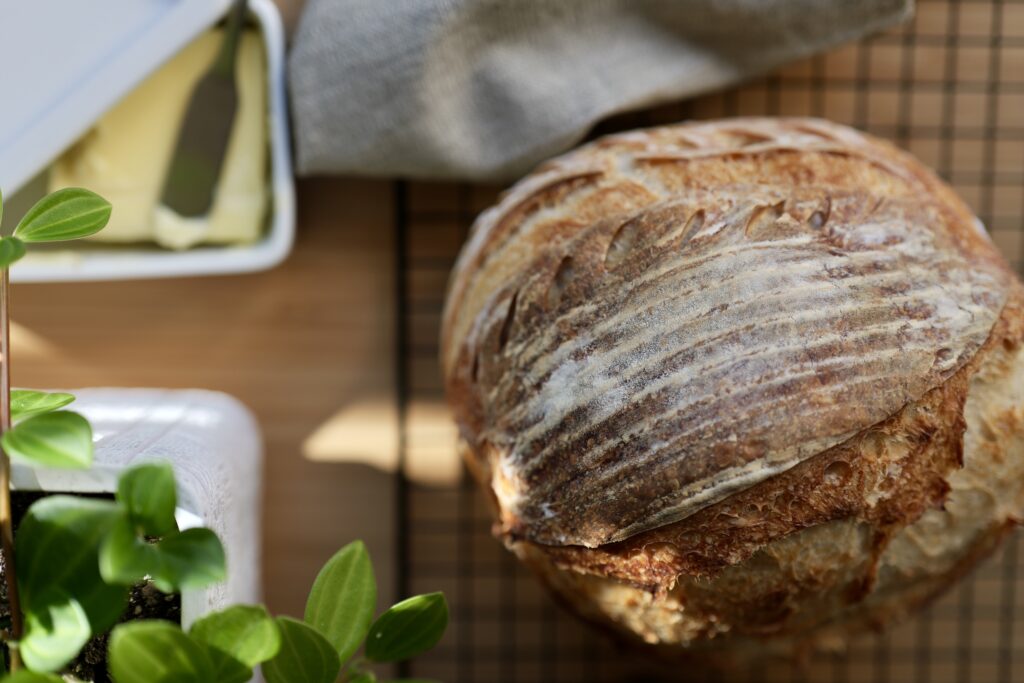
Why I Started Baking Sourdough Bread
Three years ago, when I moved to Tokyo, I fell in love with its many different foods and cuisines. Being in a big city, you can usually find anything. Except Sourdough in Tokyo. The Japanese typically lean towards softer, fluffier white breads. So, my craving was increasing by the day. During a visit to a Ukranian friend’s house, I found out she, too, missed that familiar sourdough bite. She’d already taken the plunge into making her own, and her enthusiasm was infectious. Inspired by her journey, I decided to try it and began cultivating my starter. It took a few tries, but eventually, I got the hang of it. Today, I bake my sourdough, and it’s as delicious as I remembered.
The Sourdough Recipe Decoded
Understanding the sourdough formula is easy. It’s a straightforward ratio: Choose your preferred flour amount, add 70% water, mix in 20% starter, and finish with 2% salt. No math degree is needed – I’ve got you covered!
- For a large loaf: 500 grams of flour, 350 grams water, 100 grams starter, 10 grams of salt.
- A moderate loaf: 400 grams flour, 280 grams water, 80 grams starter, 8 grams salt.
- Smaller loaves: 300 grams flour, 210 grams water, 60 grams starter, 6 grams salt.
Steps to Sourdough Success:
Mixing the Dough
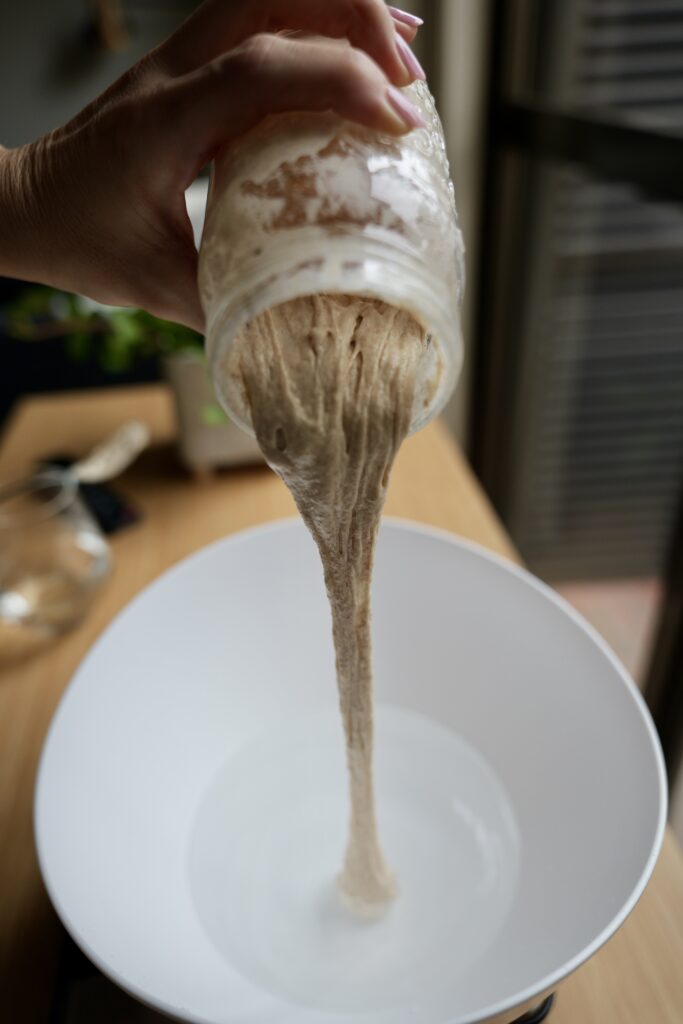
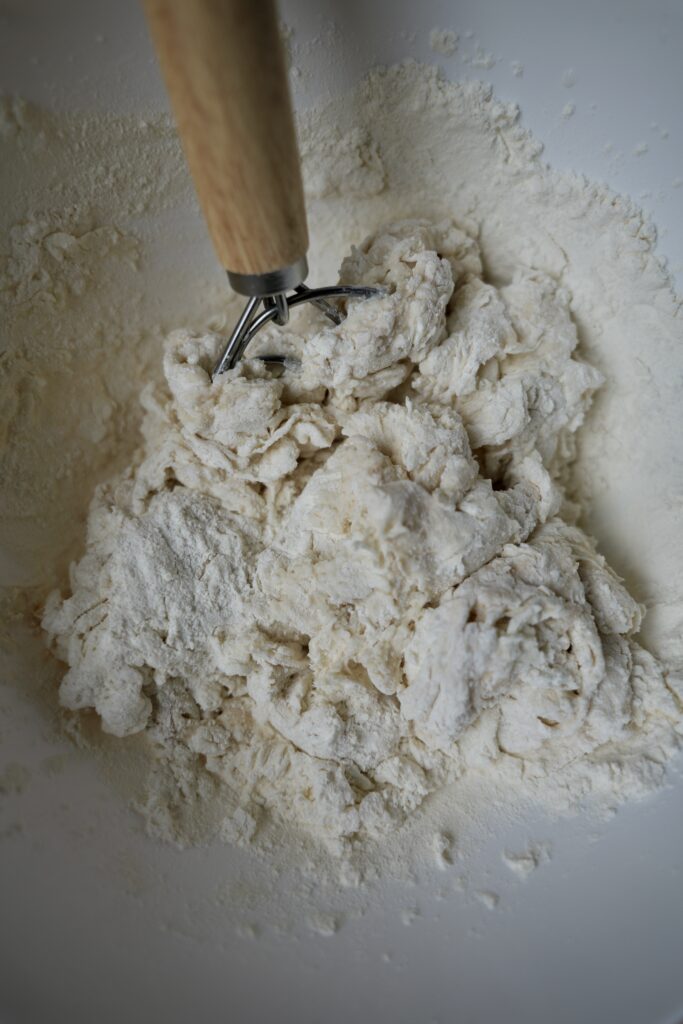
- Using room-temperature filtered water, measure the required amount in a large mixing bowl. Add the amount of the starter.
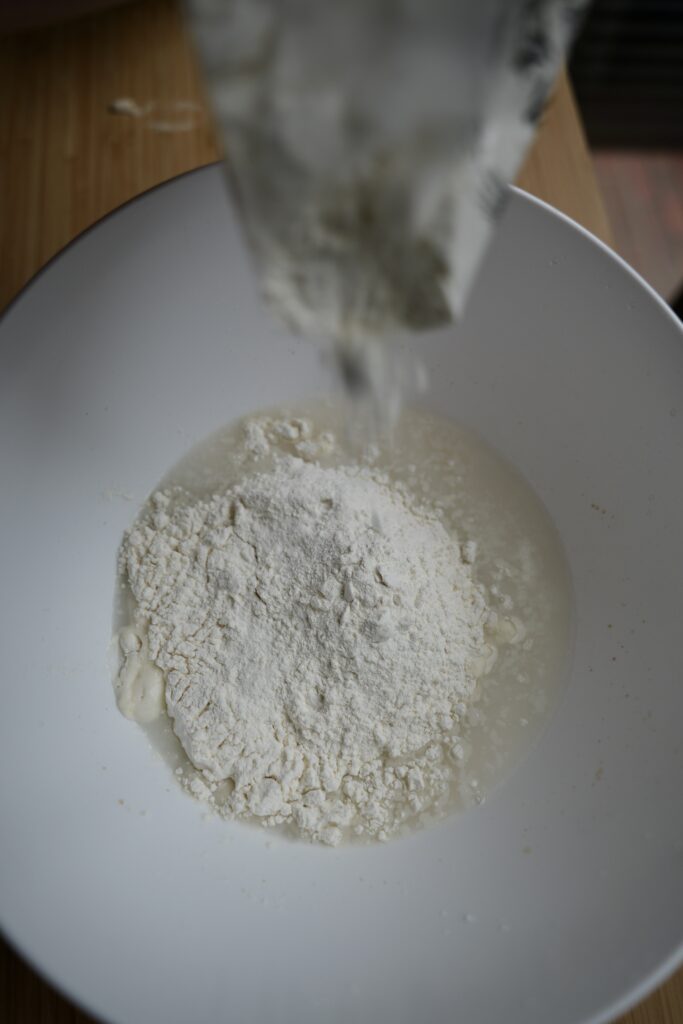
- Gently mix before integrating the salt and flour. I swear by a Dutch bread whisk for a thorough mix.
- Don’t stress about kneading! A minute of good mixing does the trick. Cover your dough with a cloth and let it rest for an hour.
- After the hour, dampen your fingers and stretch the dough from one side, folding it in. Repeat on all four sides. Let it rest another hour.
- This stretching process can be repeated twice more, waiting one hour in between. Then, let it rise until nearly doubled. Depending on the season, this could range from 4-12 hours. Note: Begin counting fermentation time from when the starter is mixed in with the flour.
- When you notice the dough has nearly doubled in size (the bulk fermentation phase), it’s time to shape it.
Final Shaping of the Dough
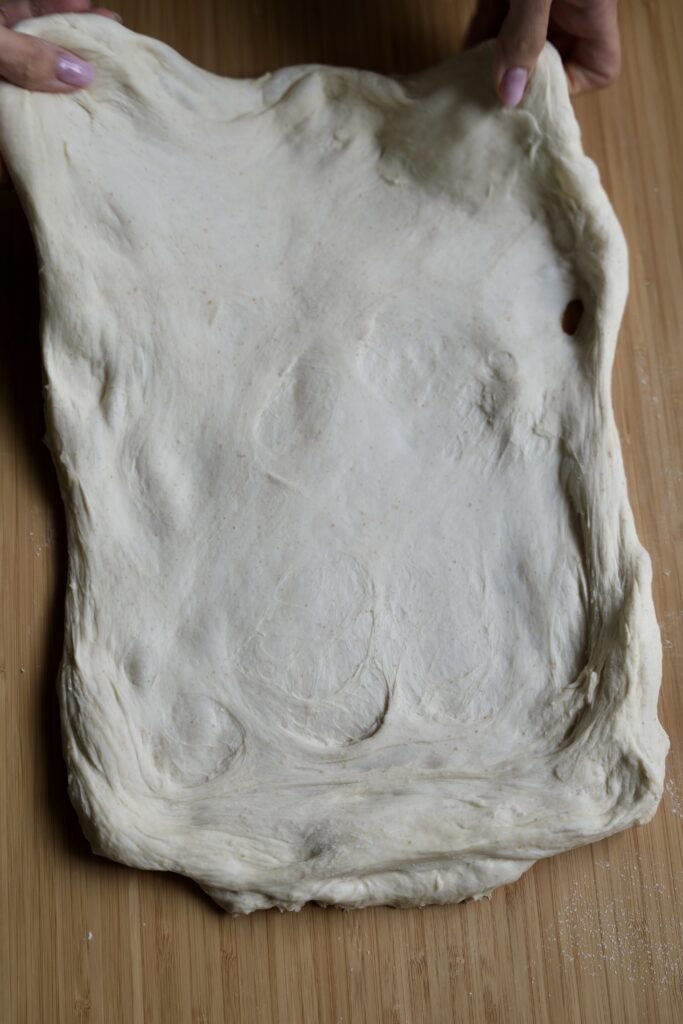
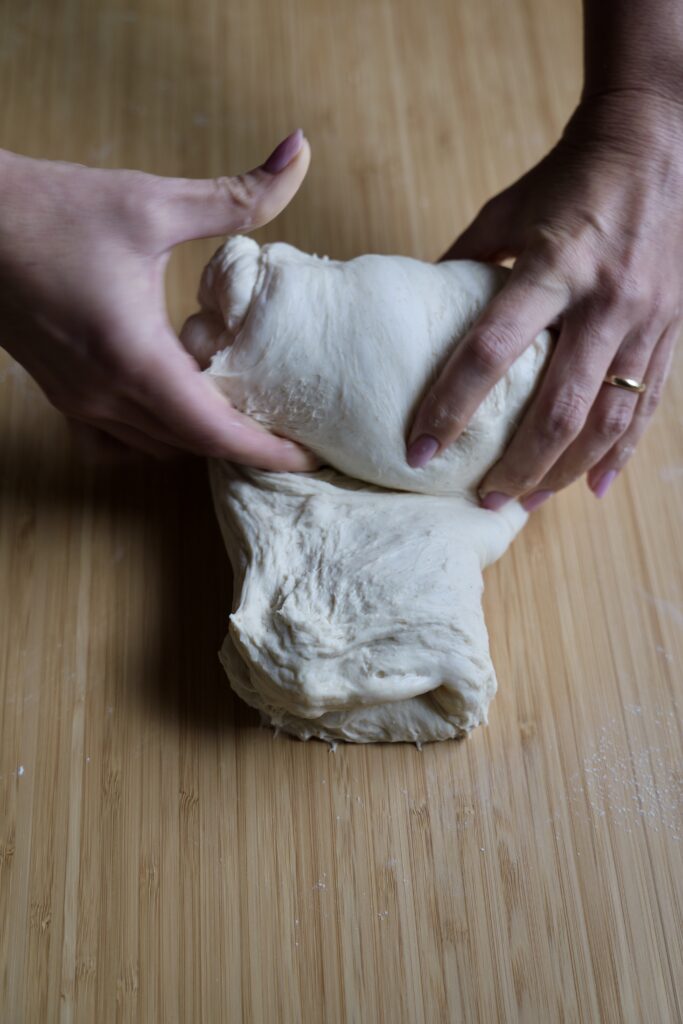
- Look at the pictures below. You will lightly flour a clean surface and transfer your dough onto this surface.
- Gently stretch the dough out, aiming for a rectangular or square shape.
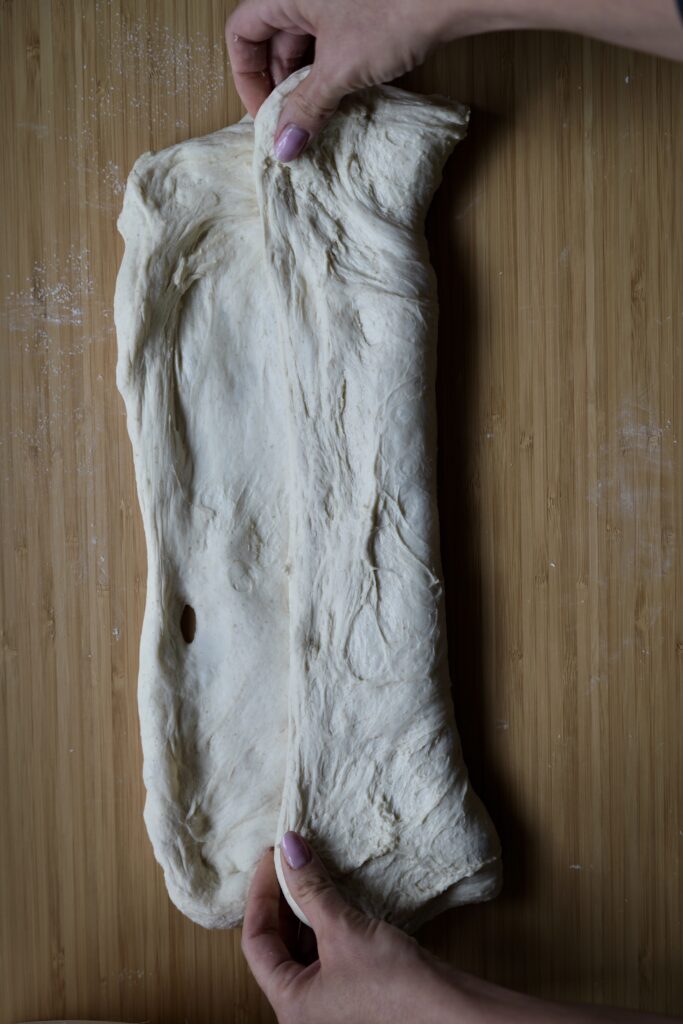
- Time for folding! Fold one third of the dough inward, then do the same from the opposite side, like folding a letter.
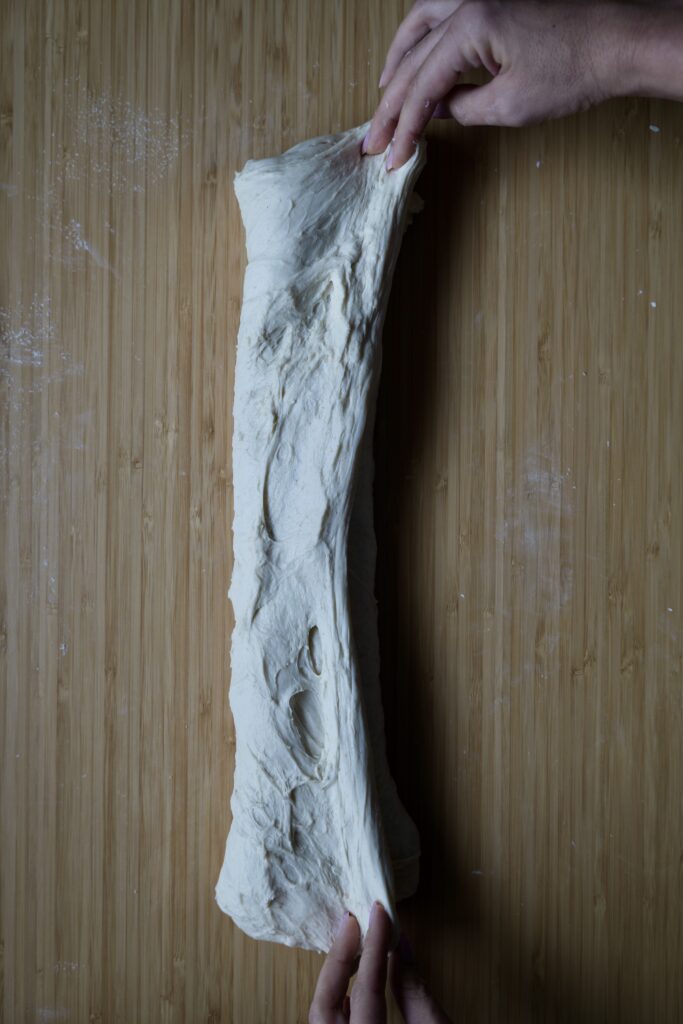
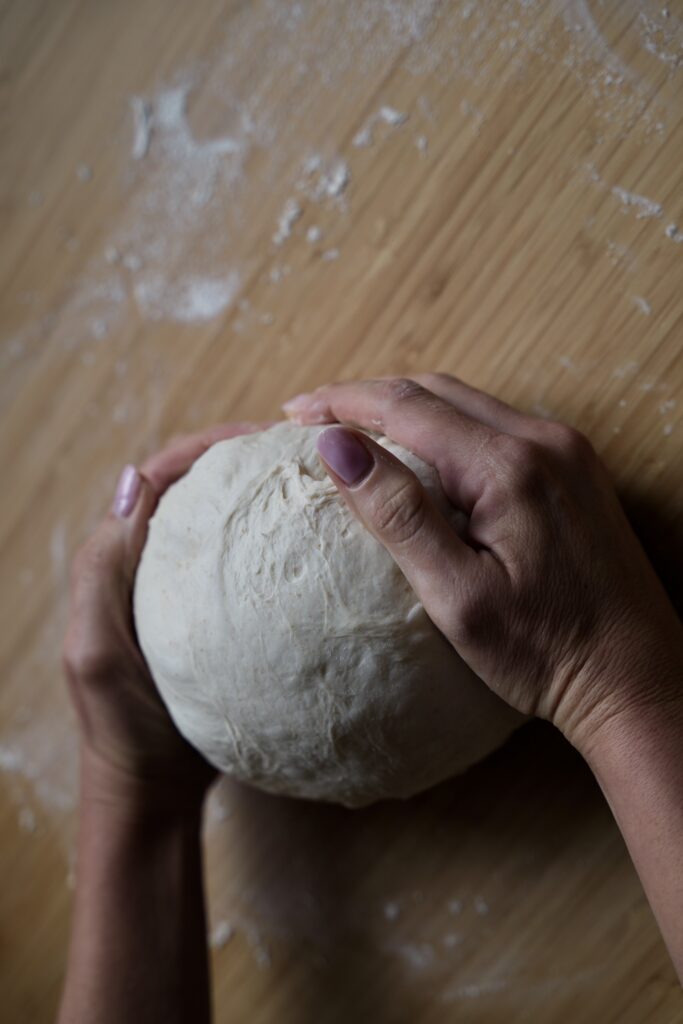
- Roll up your dough. Once rolled, pull the dough towards you, creating some tension in it. Push the dough out and pull it towards you two more times.
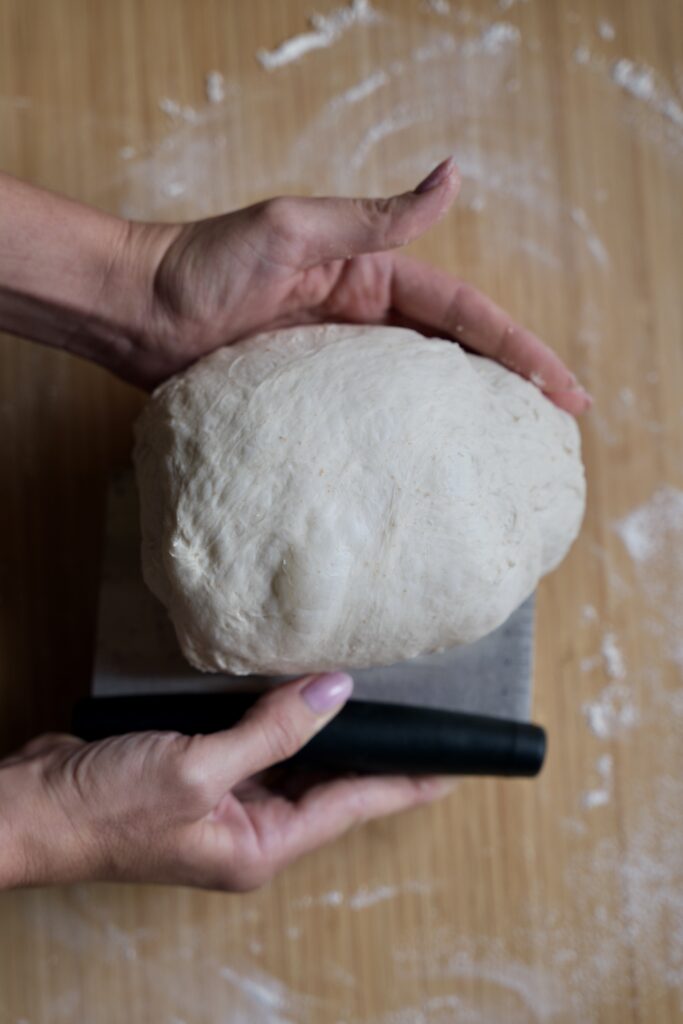
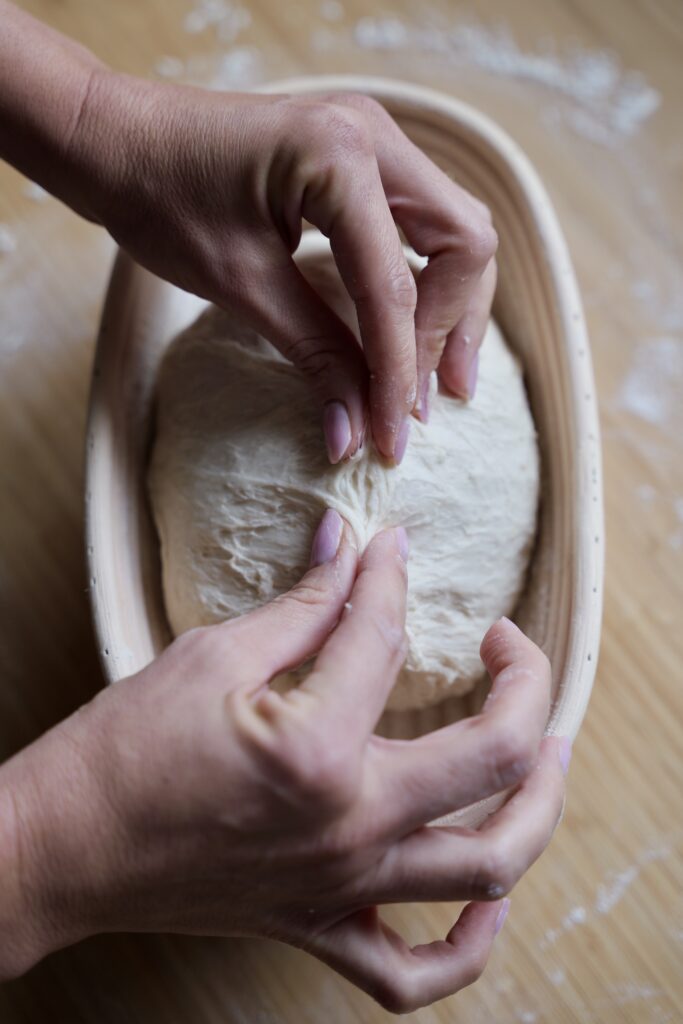
11. Using a bench scraper, lift the now tight ball-shaped dough. Place it in a lightly floured proofing basket.
12. Let the dough rest. Cover it and let it sit for 1-2 hours. Alternatively, you can refrigerate it for up to 24 hours.
Getting Ready to Bake
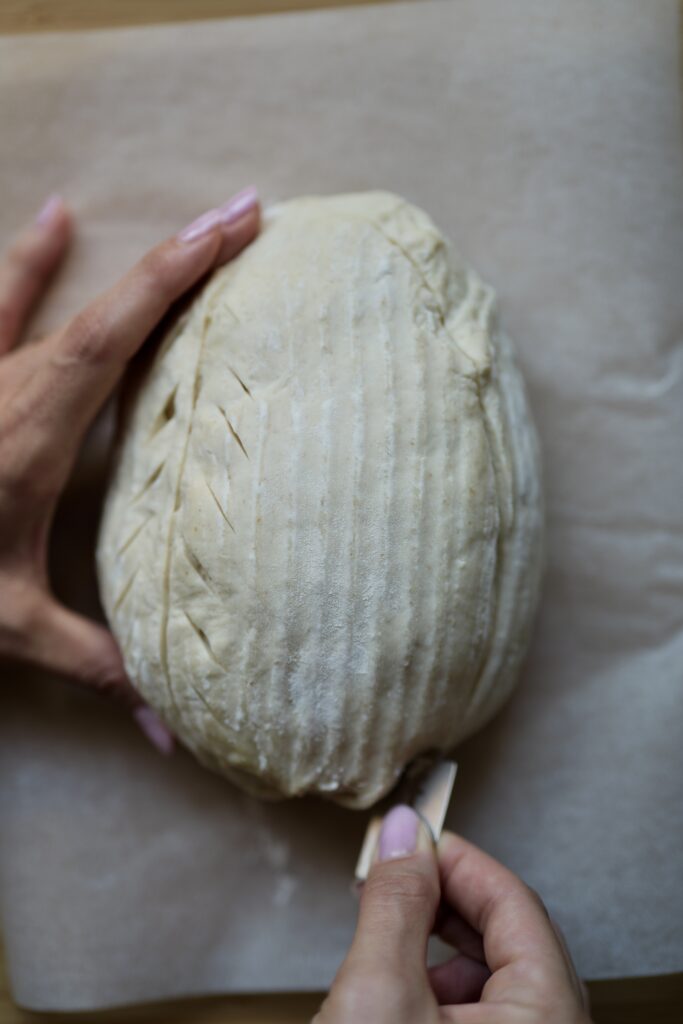
13. Transfer the dough onto parchment paper when you’re ready to bake. Now, it’s scoring time! Let your creativity shine here. A simple straight line will suffice if you’re not in the mood for fancy patterns.
14. Preheat your oven to 450°F (230°C). Make sure your Dutch oven is inside during preheating.
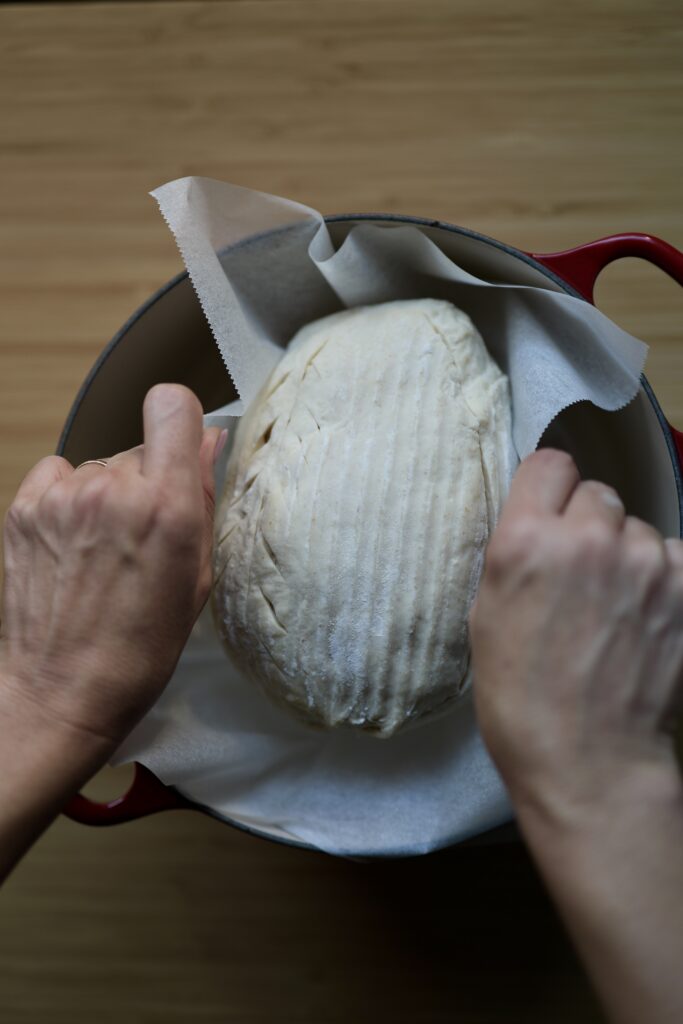
15. After preheating, carefully remove the hot Dutch oven. Transfer the dough, with its parchment paper, into the Dutch oven.
16. Cover the Dutch oven with its lid. Pop it into the oven to bake. Based on the size of your bread, 500 grams will need 25 minutes, 400 grams will require 24 minutes, and 300 grams will bake for 23 minutes.
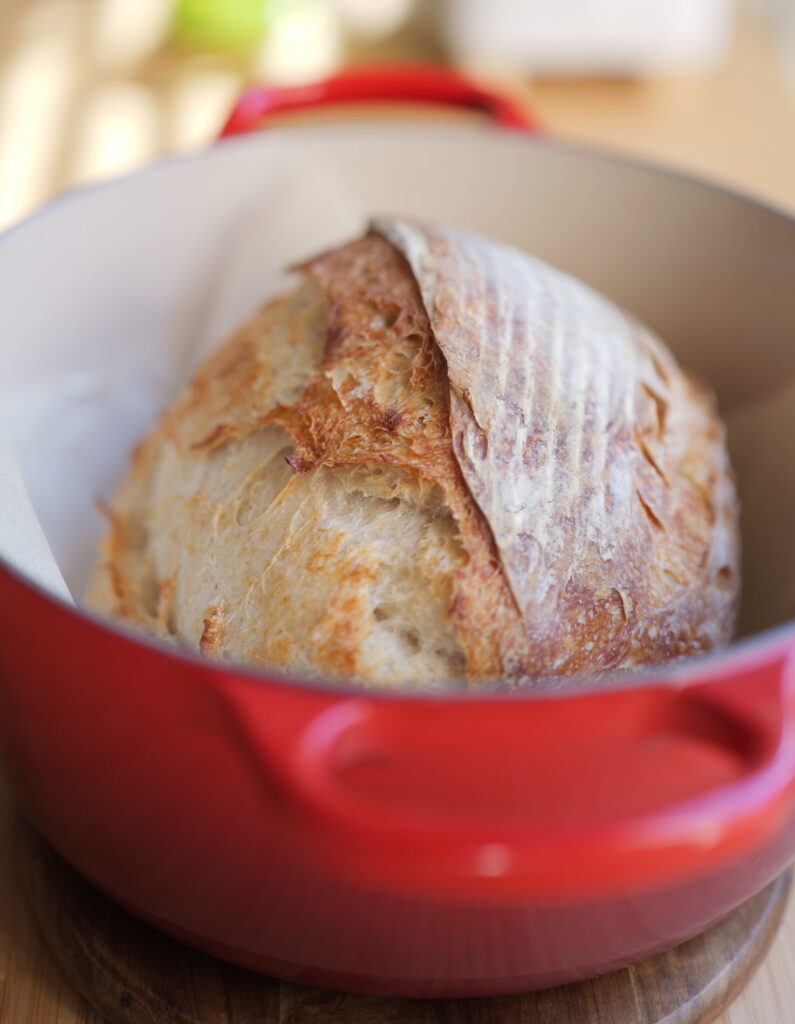
17. Remove the lid from the Dutch oven after the indicated time. Let the bread bake for an additional 23 minutes to get that lovely crust.
18. Once your bread has finished baking, carefully remove it from the Dutch oven. Place it onto a baking rack to cool.
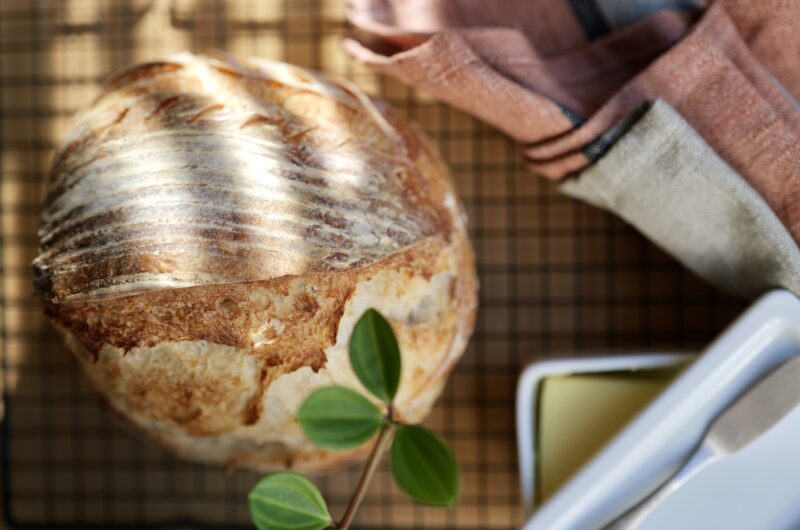
Patience is Key
Once your sourdough bread comes out of the oven, you might be tempted to slice it immediately. However, restrain yourself! Letting it cool on a rack ensures that the bottom stays perfectly crispy, avoiding any unwanted sogginess. While the anticipation can be tough, the ideal wait time is between 4 to 6 hours. Yet, if you’re in a pinch, waiting at least 2 hours is a must. Fresh out of the oven, the bread’s inner temperature remains high, causing it to continue cooking on the rack. Slice in too early, and you risk compromising its perfect texture.
The Healthier Bread Choice: Sourdough
Besides its unbeatable taste, sourdough comes with a plethora of health benefits. Its longer fermentation process breaks down gluten, making it easier to digest than other breads. This is a game-changer for someone like me who loves sandwiches! Consuming a loaf that’s both delicious and stomach-friendly? It’s the best of both worlds.
While I won’t delve into the art of creating your own starter in this post (stay tuned for a detailed guide on that!), I’ll focus on crafting the perfect loaf with an existing, thriving starter.
Sourdough Bread
Course: SidesCuisine: AmericanDifficulty: Medium10
servings20
minutes48
minutes201
kcalThis recipe is for 500 grams of flour. Above, I go over different bread sizes and the ingredients required.
Ingredients
500 grams bread flour
100 grams activated starter
350 grams filtered room temperature water
10 grams salt
Directions
- In a large mixing bowl, add the water.
- Gently stir in the sourdough starter until slightly combined with the water.
- Mix in the salt and flour until it’s combined. You don’t need to knead the dough, just mix it for about one minute.
- Cover the bowl with a cloth and allow the dough to rest for one hour.
- After the rest period, begin a series of stretches and folds: stretch the dough up and fold it over itself, rotating the bowl quarter turns and repeating the stretch-and-fold process several times.
- Cover the bowl with a cloth and allow the dough to rest for one hour.
- Stretch and fold again, then, cover the bowl and let it rest for one more hour.
- After the hour, repeat the stretch and fold one last time. This last stretch and fold can be omitted if you need to leave the house. It is not absolutely necessary.
- Allow the dough to rest, covered, for another 2 to 10 hours, or until it has risen significantly and has bubbles on its surface. This is the tricky part. The bulk fermentation time will depend on the temperature of your house. After the third stretch and fold, my dough rests for another 2 hours on hot summer days. On cold winter days, it rests for another 4-5 hours.
- Lightly flour a clean surface. Transfer your dough onto the prepared surface.
- Begin stretching the dough out into a rectangular or square shape (see pictures above)
- Fold in one-third of the dough from one side, then fold in another third from the opposite side (see pictures above).
- Roll up the dough tightly (see pictures above).
- Pull the dough towards you to create tension in it. Repeat this rolling and pulling action 2 or 3 times.
- Using a bench scraper, lift the dough (now in a tight ball shape) and place it in a lightly floured proofing basket.
- Let the dough sit covered for 1-2 hours at room temperature or for an extended time in the fridge for up to 36 hours. If leaving in the fridge for longer than 2 hours, I recommend covering with a plastic bag to prevent dough drying.
- When ready to bake, preheat your oven to 450°F (230°C) with your Dutch oven inside.
- Transfer the risen dough onto a piece of parchment paper. Score the dough according to your preference.
- Remove the preheated Dutch oven from the oven and place the dough (with the parchment paper) inside. Cover with the lid. Bring it to the oven.
Adjust baking time based on the weight of your dough:
500-gram bread: 25 minutes
400-gram bread: 24 minutes
300-gram bread: 23 minutes - After the initial baking time, remove the lid and continue baking for another 23 minutes.
- Once baked, take the bread out of the Dutch oven and transfer it to a baking rack to cool.
- Please allow the bread to cool completely before you cut it. I recommend waiting 4-6 hours before slicing. If you are in a rush, wait at least 2 hours.
Please be aware that the information provided with this recipe is intended solely for general informational purposes. While we have tried to accurately test this recipe and present precise measurements and instructions, individual results may vary due to differences in ingredient types, cooking equipment, or preparation techniques.The nutritional information accompanying this recipe is not intended as dietary or medical advice. For any specific health or nutritional inquiries, please consult a registered dietitian or healthcare professional. We disclaim any liability for inaccuracies or misrepresentation of the provided information. We encourage users to approach this recipe with a mindful understanding that cooking is both an art and a science, and to use their best judgment in the kitchen.
Nutrition Facts
10 servings per container
- Amount Per ServingCalories201
- % Daily Value *
- Total Carbohydrate
42g
15%
- Dietary Fiber 1.5g 6%
- Protein 5.5g 11%
* The % Daily Value tells you how much a nutrient in a serving of food contributes to a daily diet. 2,000 calories a day is used for general nutrition advice.